install.packages("usethis")
Have you completed all steps in Git/GitHub Part 1?
If you have not created a GitHub account and entered your information in the Terminal, go back to Part 1 and complete those steps before moving on to the steps in this part.
Things to keep in mind
Canvas video
There is a video on going through all these steps in the Week 6 module on Canvas (and here).
What is a personal access token?
From GitHub’s documentation:
Personal access tokens are an alternative to using passwords for authentication to GitHub when using the GitHub API or the command line.
Steps
In RStudio
1. Install usethis
Do this in the console!

2. Generate a personal access token using usethis
Again, do this in the console!
usethis::create_github_token()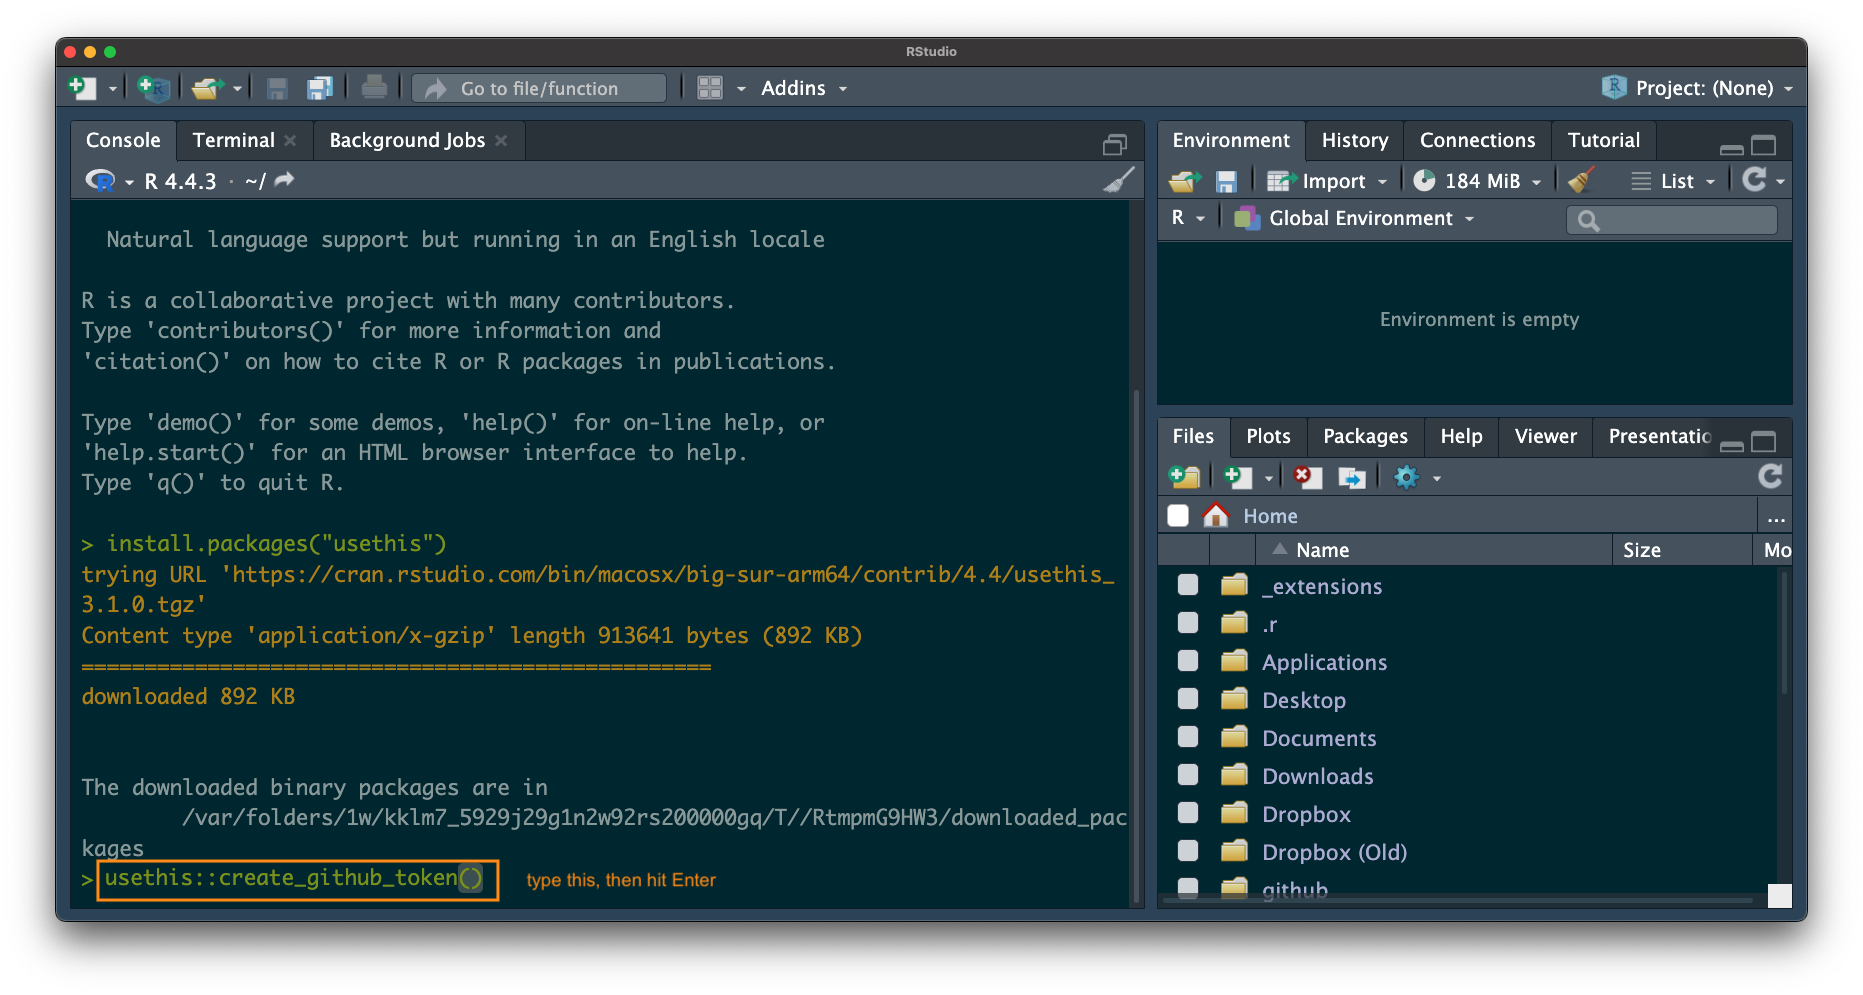
This will lead you to a web browser.
(if prompted) in the web browser, enter your GitHub password.
In your browser
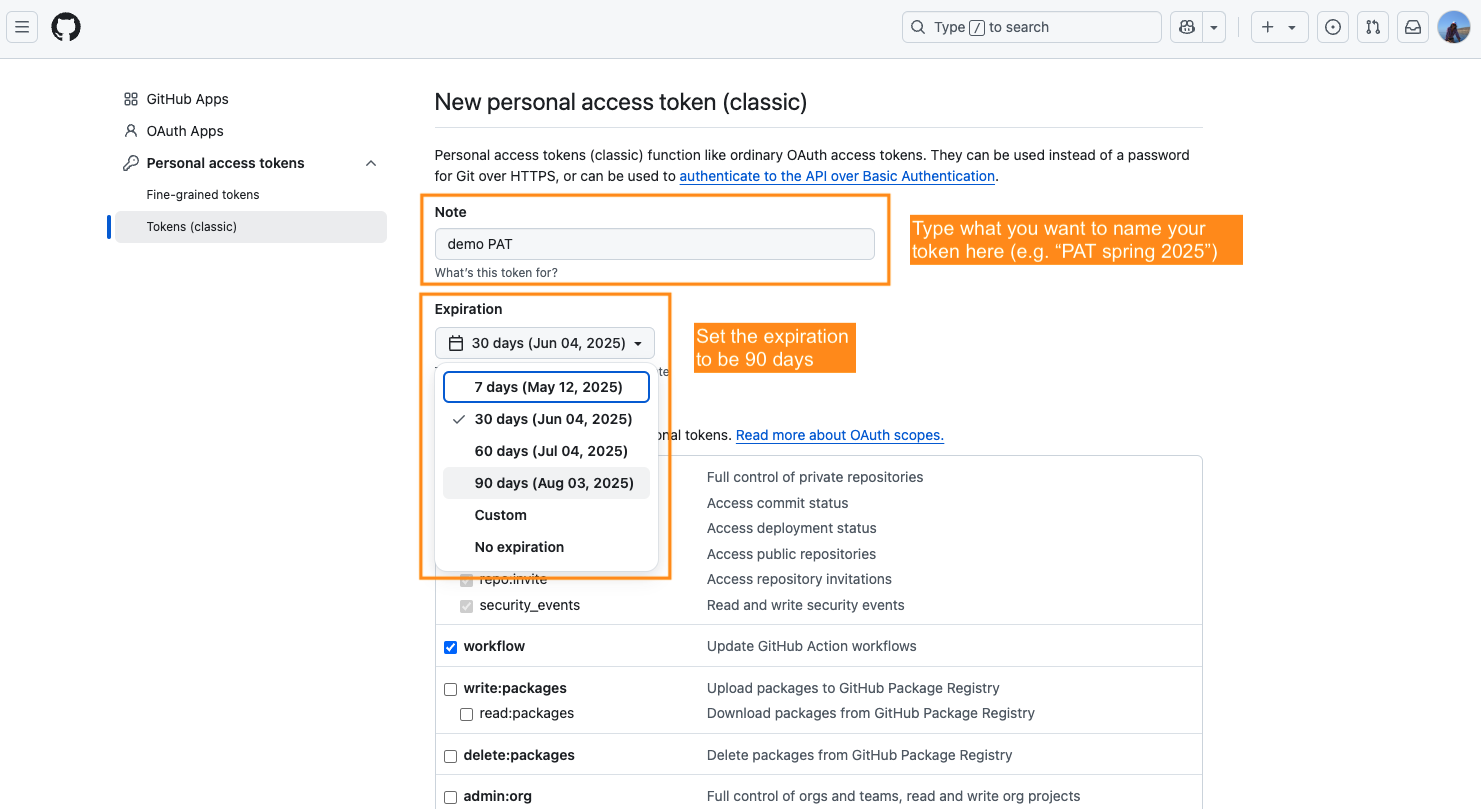
3. Fill in the information about your personal access token.
Under “Note”, name your PAT. A logical name could be “PAT spring 2025”.
Under “Expiration”, select 90 days.
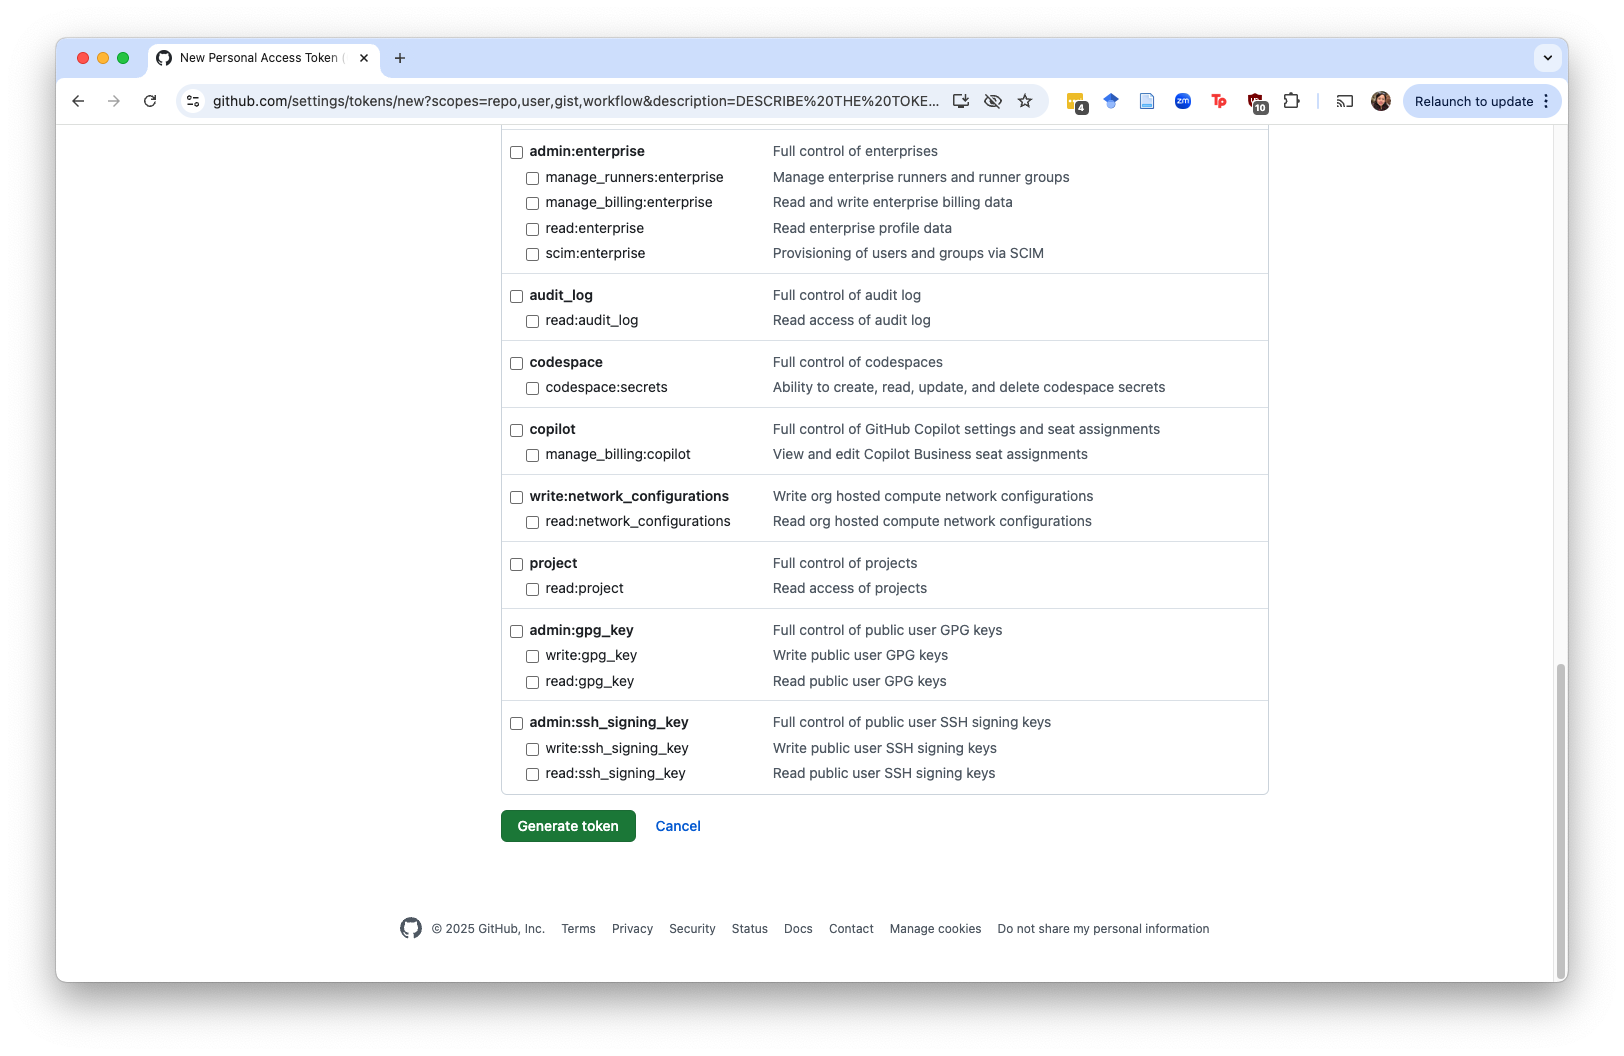
4. Scroll to the bottom of the page, hit Generate token
DO NOT MODIFY ANY OF THE PRE-SELECTED CHECK BOXES.
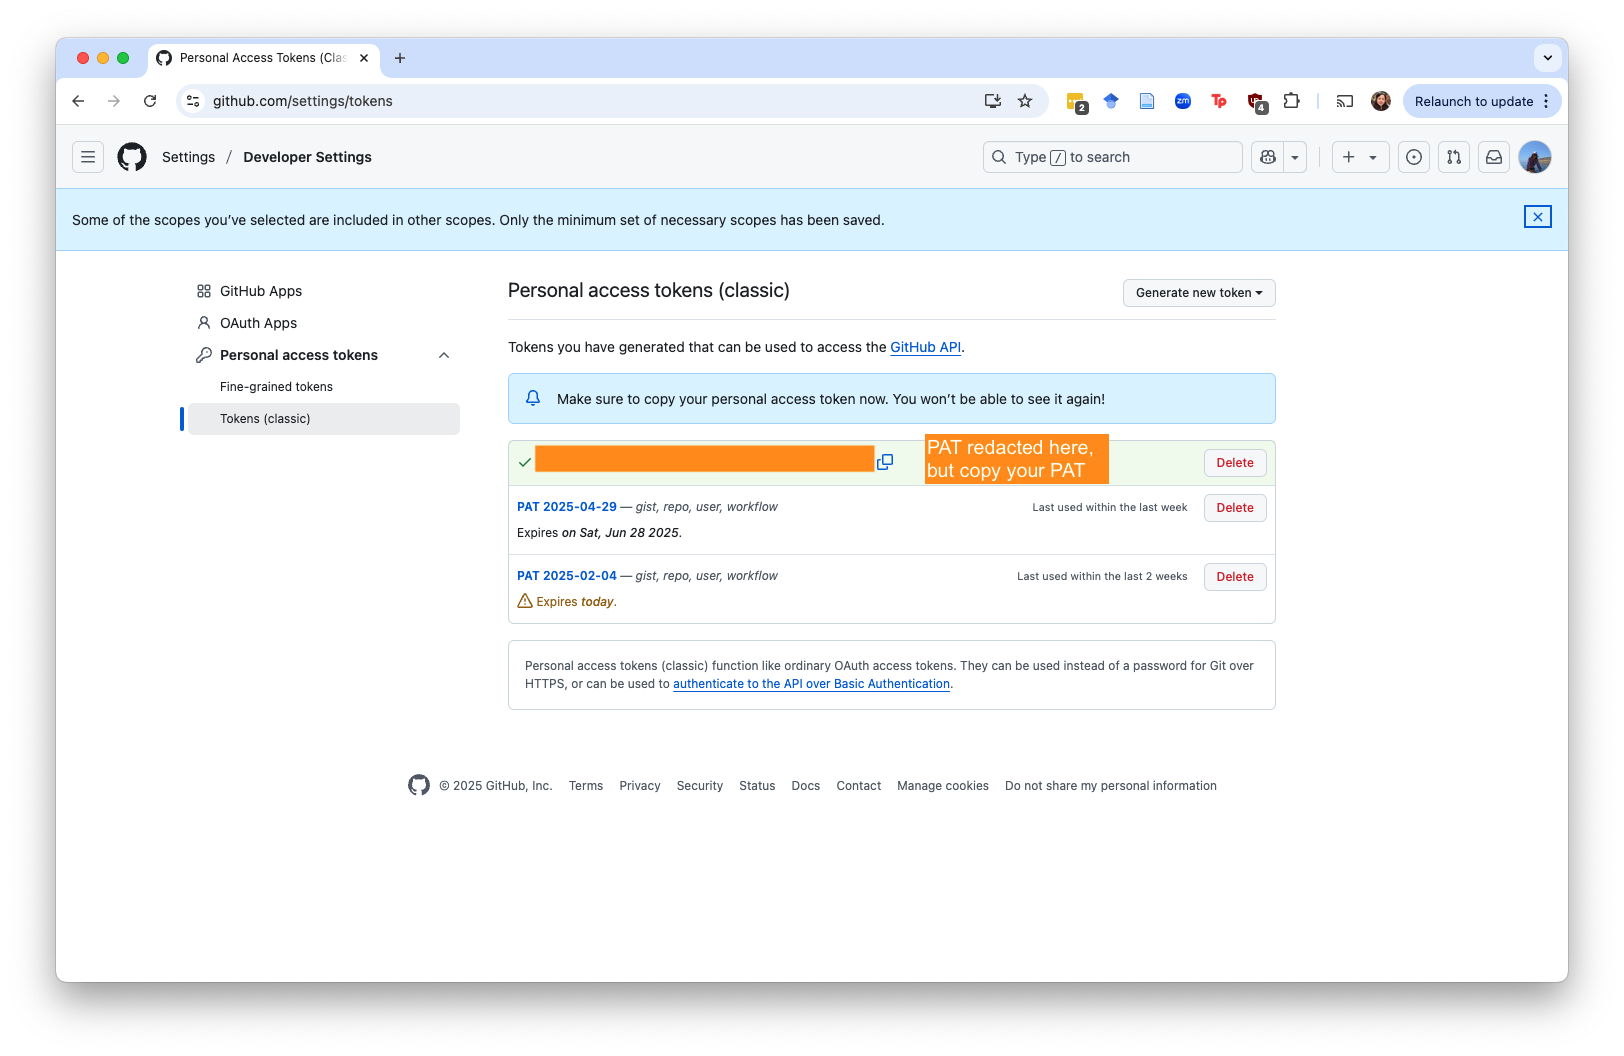
5. Copy the personal access token to your clipboard
Back in RStudio
6. Set the personal access token.
Run this in the console!
gitcreds::gitcreds_set()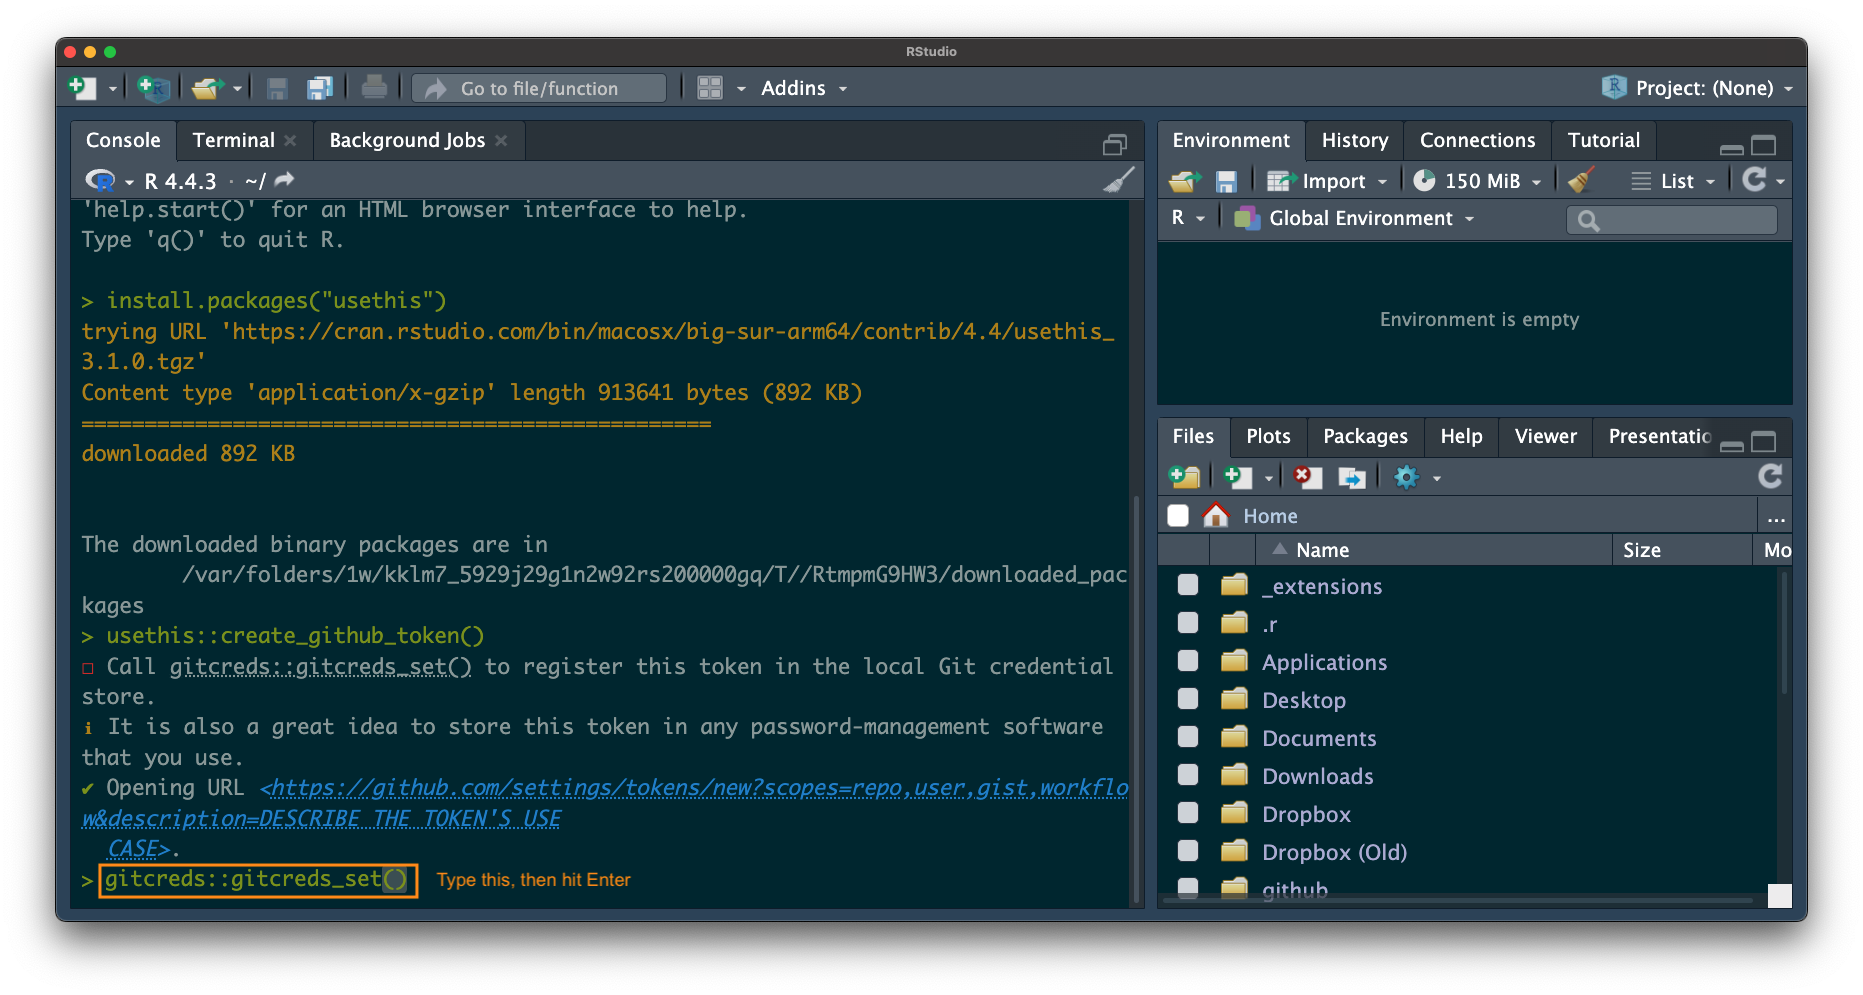
7. Paste your personal access token when prompted
Paste your PERSONAL ACCESS TOKEN. NOT YOUR GITHUB PASSWORD. NOT YOUR COMPUTER PASSWORD.
PASTE YOUR PERSONAL ACCESS TOKEN.

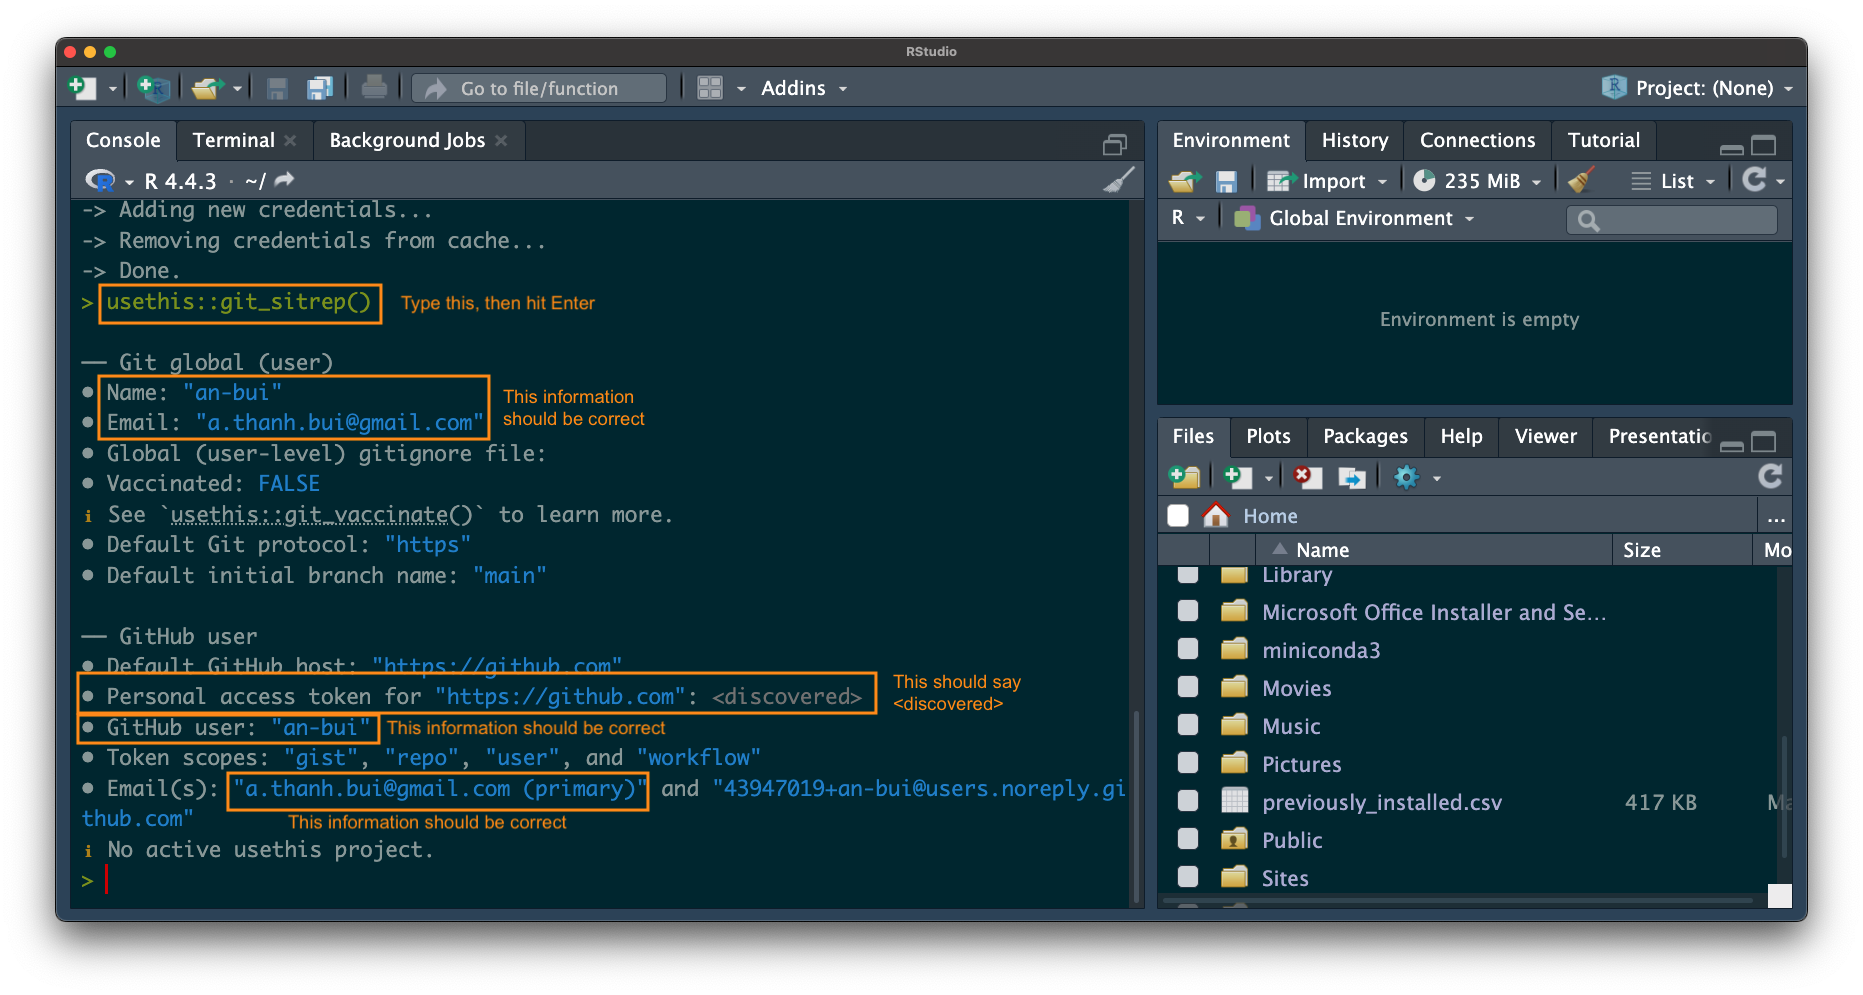
8. Double check that the personal access token is stored
Again, run this in the console:
usethis::git_sitrep()Check that your user name and email are correct.
Check the Personal access token field under GitHub. This should say <discovered>.